|
Creating Pearl Bead Borders for Cakes Using a Bead Maker
by Renee Shelton
Ideas for Cake Decorating, Wedding Cake Design, and Three Dimensional Cake Art |
|
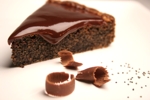
| Pearl beads for borders are beautiful on both fondant covered and buttercream frosted cakes. Creating them is simple using the various silicone bead making tools that are now available to cake decorators. Choices in beads include classic round styles, oval, faceted, or rose-shaped beads. The easiest way to apply the beads onto the border of the cake is to leave them in their strings after unmolding, then place in sections with the ends touching. They can also be broken up in individual beads and used thay way. |
Bead maker kits include the mold and instructions for using them. |
Basic Instructions for Using Bead Maker Molds for Making a Row of Beads
If you are creating beads without the luster dust, spray very lightly with a cooking spray for release or use a light dusting of cornstarch to prevent sticking.

Iridescent colors and pearl shades work well for making bead borders.
Tools Needed
Instructions
- Prepare the silicone bead molds by taking the small sugar crafting brush and dipping it in the pearl luster or sugar craft dusting powder. Dust the mold cavities of each bead liberally to ensure each bead will be evenly coated with the dust, and to make sure the rolled fondant does not stick to the mold itself after pressing.
- Dust a flat work surface with a small amount of cornstarch. Knead about a golf ball size of fondant until it is soft and pliable. Roll the fondant into a rope that is slightly larger than the diameter of the pearl bead mold cavity. Note the texture of the fondant - if it is really sticky when rolling it out, it will probably stick to the mold cavity.
- Place a portion of the fondant rope into one half of the mold and press down with the other half firmly and evenly. Alternately, keep the rope on the countertop, then open up the mold and place open-side down over the rope, press down to grab, then close to seal the mold.
- Ensure the mold has been completely filled by opening it and checking. If not, press in additional fondant until the bead mold is filled up, then re-press to mark the beads.
- With the mold still closed, scrape off any pressed fondant that has been squeezed from the closed mold with the offset spatula.
- Open up the bead maker mold, and gently flip out the newly created bead border.
- Trim the edges until even, or into the desired length.
- Continue creating sections of beads by pressing in more rolled cylinders of the fondant into the cavity, ensuring each time that the mold has been dusted with the luster powder to prevent sticking.
- Place the sections of the prepared pearl beads around the border of the cake, trimming sections and pressing them together when necessary, to create a seamless border.
Instructions For Creating Individual Beads Using the Bead Maker
Individual beads are used for pressing onto the sides of the cake or used to drop on the top in a scattered pattern. They can also be pressed onto the borders and used the same way the strings of beads or pearls are used. While individual beads can be done by simply rolling mini balls by hand, this can be labor intensive and may not result in perfectly even-sized beads or balls.
To create perfectly even individual beads, use the same materials as above, and follow the steps until step 6. Then, once the bead string has been made and flipped out onto the work surface, take a sharp knife and cut the individual beads apart. If round beads, they may be rolled in your hand to true up the size and shape, and if in a special shape, like rose or faceted, press gently if out of shape to keep the design intact. Let the individual beads dry, then attach to the cake as decoration. |
|
|
|
|
|
Index
of Recipes
Pastry & Baking Charts
_______________________
Cake
Recipes
Frosting,
Buttercream,
Icings, Glazes
Cookies, Bars
& Biscotti
Confections, Truffles, Candy
Pies, Tarts, Tartlets
Crusts, Shells, Bases
Quick & Yeast Breads
Desserts
Basic Recipes
Frozen, Ice
Creams, Sorbet
What the...?
Savory Items for Tea Menus
Industry Recipes,
Quantity Scale
Index of Recipes
Charts
below are in:

Conversion
to Metric
Conversion
to US
Equivalency
& Common Measures
General
Oven Chart
Ice
Cream Scoop Measures
Measures,
Equivalents and Substitutions
General Can
Sizing
Metric
Units of Measure
Sugar Stages
Temperature
Conversions
|